Introduction to Eco-Friendly Cleaning
Why Choose Homemade Cleaners?
Making your own all-purpose cleaner at home is more than just a fun DIY project—it’s a conscious choice that benefits both your health and your environment. Commercial cleaning products often contain harsh chemicals that can cause allergies, irritate the skin, or trigger respiratory problems. By switching to homemade alternatives, you take control of what goes onto your kitchen surfaces, ensuring a safer space for your family.
Homemade cleaners also allow you to avoid unnecessary plastic waste and reduce exposure to synthetic fragrances. They are budget-friendly and straightforward to make, requiring only common ingredients you likely already have around the house. This means less reliance on store-bought products and a smaller carbon footprint overall.
Benefits for Your Kitchen and the Environment
The kitchen is the heart of any home, and keeping it clean is essential for health and hygiene. Using eco-friendly cleaners helps maintain surfaces without stripping away natural finishes or leaving behind harmful residues. Ingredients like vinegar and essential oils cleanse deeply while being gentle on materials such as wood, granite, and stainless steel.
From an environmental standpoint, choosing natural ingredients reduces chemical runoff that can contaminate water systems and harm wildlife. Plus, when you make your own cleaner, you can reuse spray bottles, cutting down on single-use plastics. It’s a sustainable way to care for your home and the planet simultaneously.
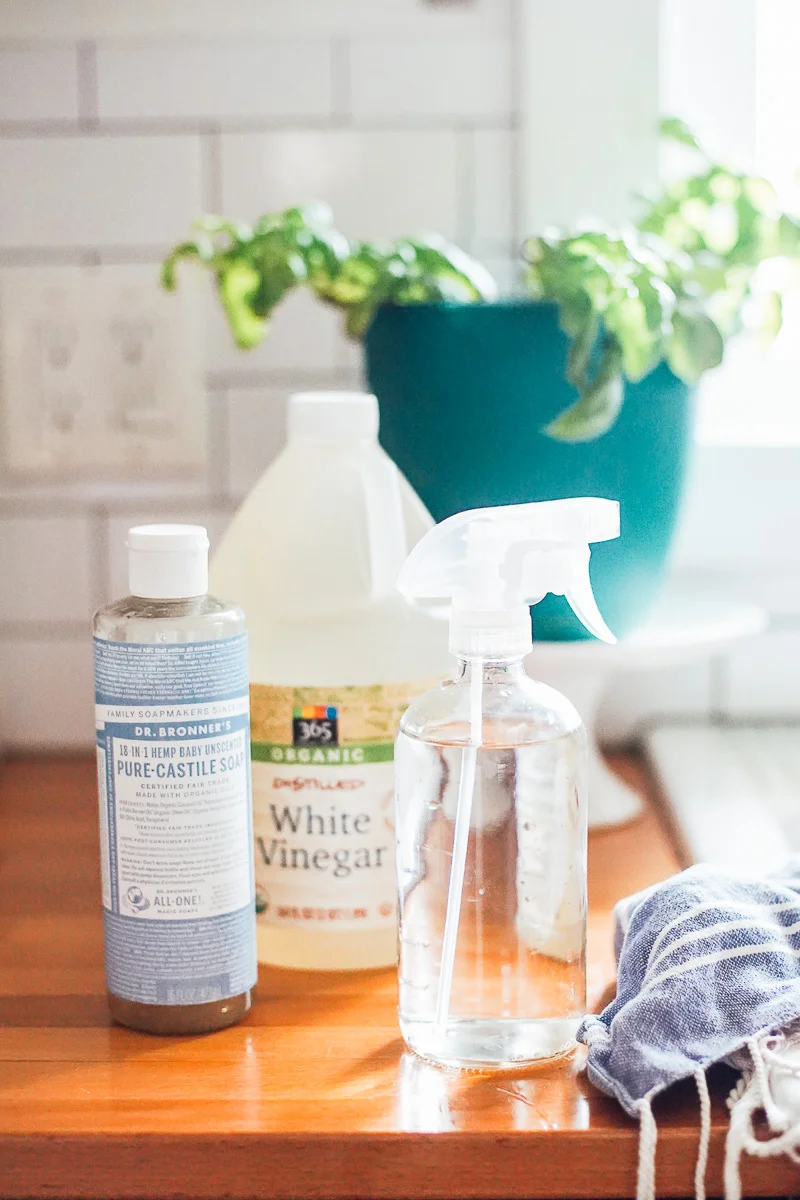
Essential Ingredients for an All-Purpose Cleaner
Natural Cleaning Agents
Creating an effective all-purpose cleaner starts with selecting the right natural ingredients. Vinegar is a superstar in home cleaning: its acidity breaks down grease, grime, and mineral deposits effortlessly. Baking soda is another powerhouse, perfect for tackling stubborn stains and deodorizing surfaces.

Essential oils bring in pleasant scents and add antibacterial or antifungal properties to your cleaner. Popular choices like tea tree, lemon, and lavender not only freshen the air but also enhance cleaning power. Using these natural agents ensures your kitchen stays spotless without introducing harmful chemicals.
Common Household Items You’ll Need
Aside from the natural cleaning agents, you’ll need simple items that you might already find in your kitchen or pantry. Distilled water or filtered tap water forms the base of your cleaner, ensuring that mineral deposits do not interfere with its performance. A spray bottle is also essential for easy application—using plastic ones prevents the risk of breakage, especially in bustling kitchen environments.
A funnel can help you pour ingredients neatly without spills. Labeling your homemade cleaner jar or bottle is a great way to keep track of what’s inside and when it was made. This small touch helps you monitor freshness and prevents any mix-ups in your cleaning routine.
Step-by-Step Guide to Making Your Cleaner
Preparation and Safety Tips
Before you start mixing your all-purpose cleaner, it’s important to gather everything you need and work in a well-ventilated area. Although the ingredients are natural, vinegar’s pungent smell can be strong, so keeping windows open helps freshen the air as you prepare your solution. Always wear gloves if you have sensitive skin to avoid irritation from acidic components.
Be cautious when handling essential oils. Some oils can cause skin sensitivity or allergic reactions, so test a small amount first or follow recommended usage guidelines. Additionally, avoid mixing vinegar with bleach or other strong chemicals, as this can release harmful fumes.
Mixing Instructions
Start by filling your spray bottle with about one cup of distilled water. Add half a cup of white vinegar, which provides the acidic punch needed to clean greasy or sticky kitchen surfaces. Next, choose your essential oils—about 10 to 15 drops will suffice for a fresh scent and extra antimicrobial benefits. Shake gently to combine all ingredients.
If you want to boost scrubbing power, add a teaspoon of baking soda, but be sure to add this slowly since it will fizz upon contact with the vinegar. After sealing the bottle, give it a good shake before each use to keep the mixture well-blended. This simple blend is ready to tackle countertops, appliances, and other kitchen areas.
Storage and Shelf Life
Store your homemade cleaner in a cool, dark place to preserve its potency. Because it contains natural ingredients without preservatives, it’s best to use it within one to two weeks for optimal freshness and effectiveness. If you notice the mixture separating or an off smell, discard it and prepare a new batch.
Label your bottle with the date you made it, so you can easily keep track of when it’s time to mix more. If you find the vinegar scent too strong over time, adding a few more drops of essential oil can help mask the odor. Remember that shaking the bottle before each use helps maintain a consistent formula.
How to Use Your Homemade Cleaner Effectively
Cleaning Different Kitchen Surfaces
To get the best results, spray the cleaner directly onto kitchen surfaces like countertops, stovetops, and sinks. Wipe thoroughly with a clean cloth or sponge, then rinse if necessary. For tougher spots, let the solution sit for a few minutes before scrubbing gently. Avoid using vinegar on natural stone surfaces such as marble or granite, as acidity can dull or damage these finishes.
Stainless steel appliances respond well to this natural cleaner, leaving them streak-free and shiny. Wooden surfaces can also be cleaned with care; just make sure not to saturate them and wipe dry promptly to prevent moisture damage.
Tips for Best Results and Maintenance
Shake the bottle before each use to ensure the ingredients are well mixed and effective. For added convenience, keep a spray bottle in your kitchen for quick touch-ups throughout the day. Experimenting with various essential oil blends allows you to customize the scent while exploring different cleaning properties.
If you’re new to making homemade cleaners, start with small batches to find what works best for your needs. Over time, you’ll develop a routine that keeps your kitchen fresh, clean, and eco-friendly without relying on commercial products.
Green Living: Additional Eco-Friendly Kitchen Tips
Reducing Waste in Your Cleaning Routine
Adopting an eco-friendly cleaning routine goes beyond the cleaner itself. Consider upcycling empty spray bottles or jars to reduce plastic waste. Using washable cloths instead of disposable paper towels further minimizes your environmental impact. Composting food scraps and recycling packaging are other simple ways to embrace sustainable living practices in your kitchen.
Other DIY Eco-Friendly Cleaning Products to Try
Once you’re comfortable with your all-purpose cleaner, you might want to explore making other natural cleaning products. Homemade dish soap, glass cleaner, and even laundry detergent can be crafted with ingredients like castile soap, lemon juice, and baking soda. These alternatives help create a completely green cleaning arsenal, supporting a healthier home and planet.
If you try out different recipes, share your experiences by leaving comments or ratings online. Encouraging others to make their own eco-friendly products helps build a community focused on sustainability and well-being.

