Introduction to the Reverse Sear Technique
What is Reverse Searing?
Reverse searing is a cooking method that flips the traditional searing process on its head. Instead of starting with high heat to brown the meat and then finishing it slowly, this technique begins by cooking the ribs gently at a low temperature. Once the ribs are tender and nearly cooked through, they are finished over intense heat to develop a beautifully caramelized crust. This method ensures a juicy interior paired with a crisp, flavorful exterior.
Why Choose Reverse Searing for BBQ Ribs?
Barbecue ribs are best known for their tenderness and flavor. Using reverse searing lets you gently cook the ribs to achieve that tender texture while locking in moisture. Searing at the end adds depth with a smoky, crispy bark that traditional methods might miss. It’s a fantastic way to control the cooking process, avoid overcooking, and intensify the flavor layers without sacrificing juiciness.
Preparing Your Ribs for Reverse Searing
Selecting the Right Cut and Quality
Before you start, choosing the right ribs is crucial. Baby back ribs and St. Louis-style ribs are popular choices for this technique. Look for ribs with good marbling, as the fat content will help render juices during cooking, ensuring moistness. Fresh ribs with minimal handling will provide the best texture and flavor. Proper portion size also matters; avoid ribs that are too thin, as they can dry out quickly with this method.
Essential Tools and Equipment
A reliable smoker or grill with the ability to maintain steady low temperatures is essential. A good digital meat thermometer is your best friend here—it lets you monitor internal temperatures accurately without guessing. For searing, having a grill or cast iron skillet capable of high heat is important to achieve that signature crust. Don’t forget basic tools like tongs and a basting brush for applying sauces later.
Marinades and Rubs: Enhancing Flavor Before Cooking
Building complex flavor is one of the joys of reverse searing. Applying a dry rub or marinade early gives the ribs time to absorb spices and aromatics. A well-balanced rub that includes salt, sugar, and spices will not only season the meat but also create a flavorful bark during the searing process. Remember to store your rub properly and season your ribs early for the best results. It’s also a perfect time to experiment with different flavor layers, perhaps adding a hint of sweetness or heat.
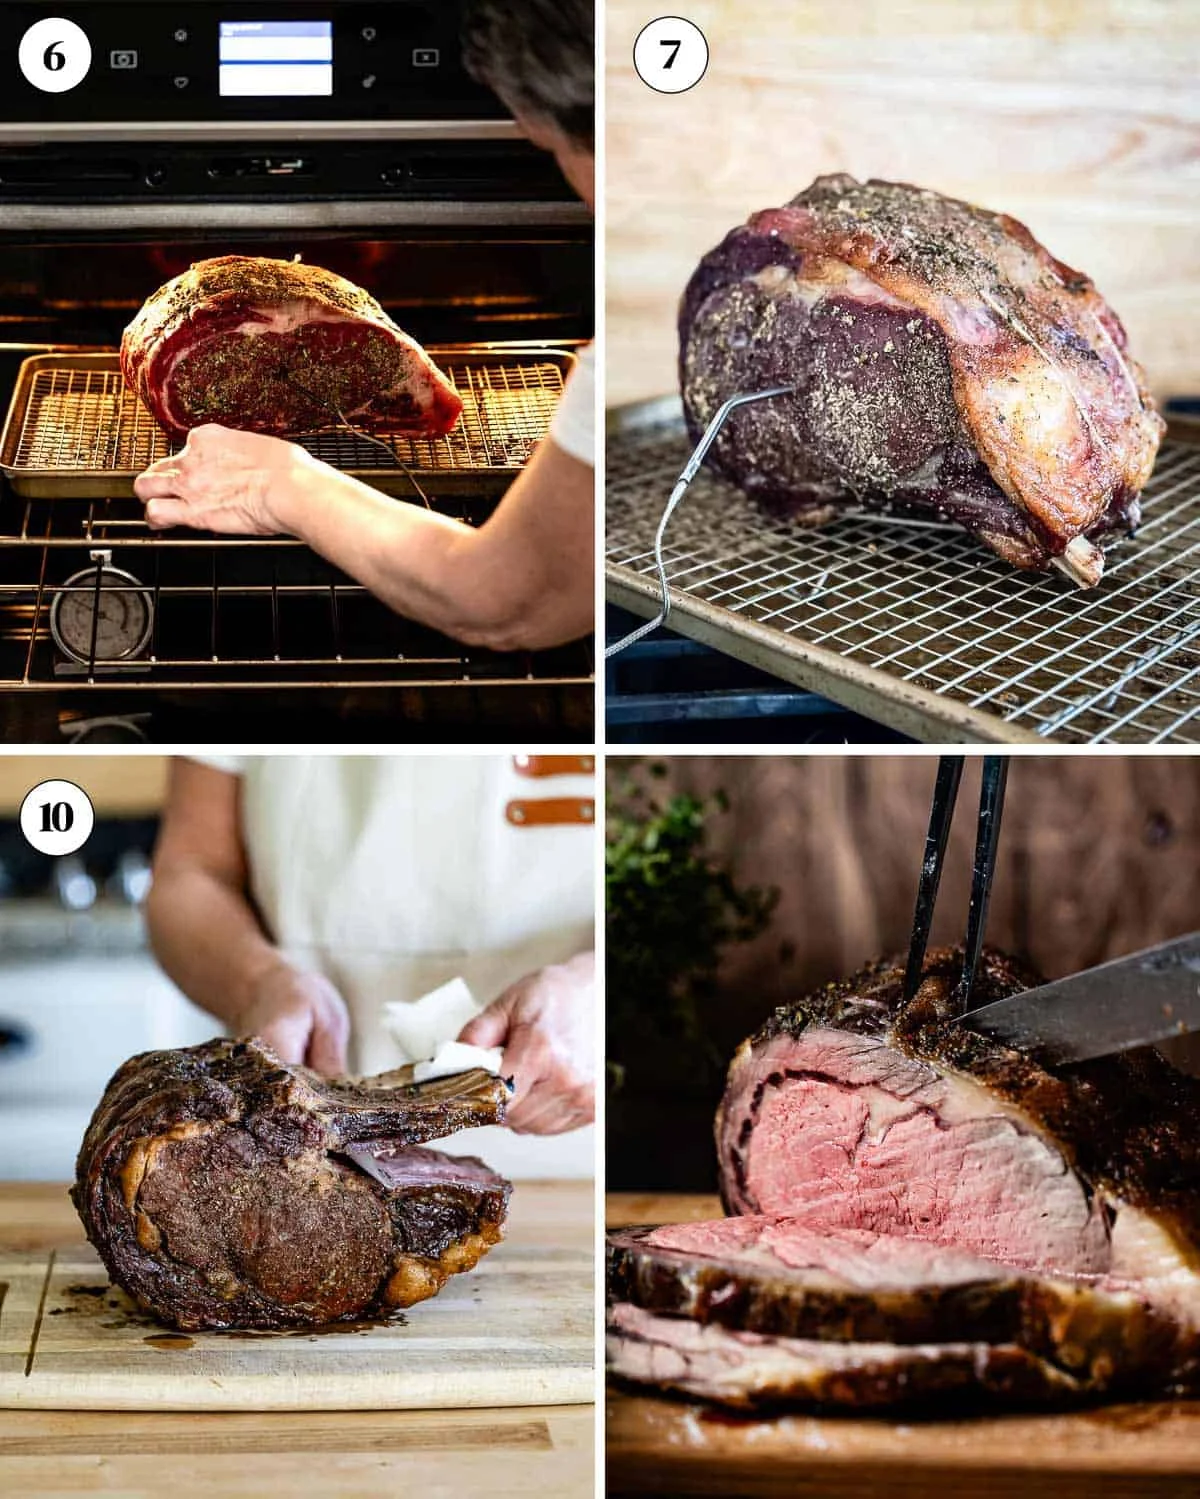
Step 1: Low and Slow Cooking
Setting Up Your Smoker or Grill
To begin, set up your smoker or grill for indirect cooking. This means placing your heat source on one side and the ribs on the other. Using wood chips can add that classic smoky flavor, but choose wisely—fruit woods like apple or cherry provide a mild sweetness, while hickory or mesquite offer a stronger punch. Make sure to maintain consistent airflow and manage the fire carefully to keep temperatures low and steady.
Cooking Temperature and Time Guidelines
Target a cooking temperature around 225°F to 250°F. Depending on the thickness of your ribs, this low and slow phase might take anywhere from two to four hours. Patience is key here; rushing this step can lead to tough meat. The goal is to gently break down connective tissues while preserving juiciness.
Monitoring the Internal Temperature
Keep an eye on the internal temperature with your thermometer. Ribs are typically ready to move on to searing when they reach approximately 165°F to 175°F. At this point, the collagen has started to break down, but the meat isn’t fully cooked. Watching the temperature ensures you don’t overcook during this stage, setting you up for a perfect finish.
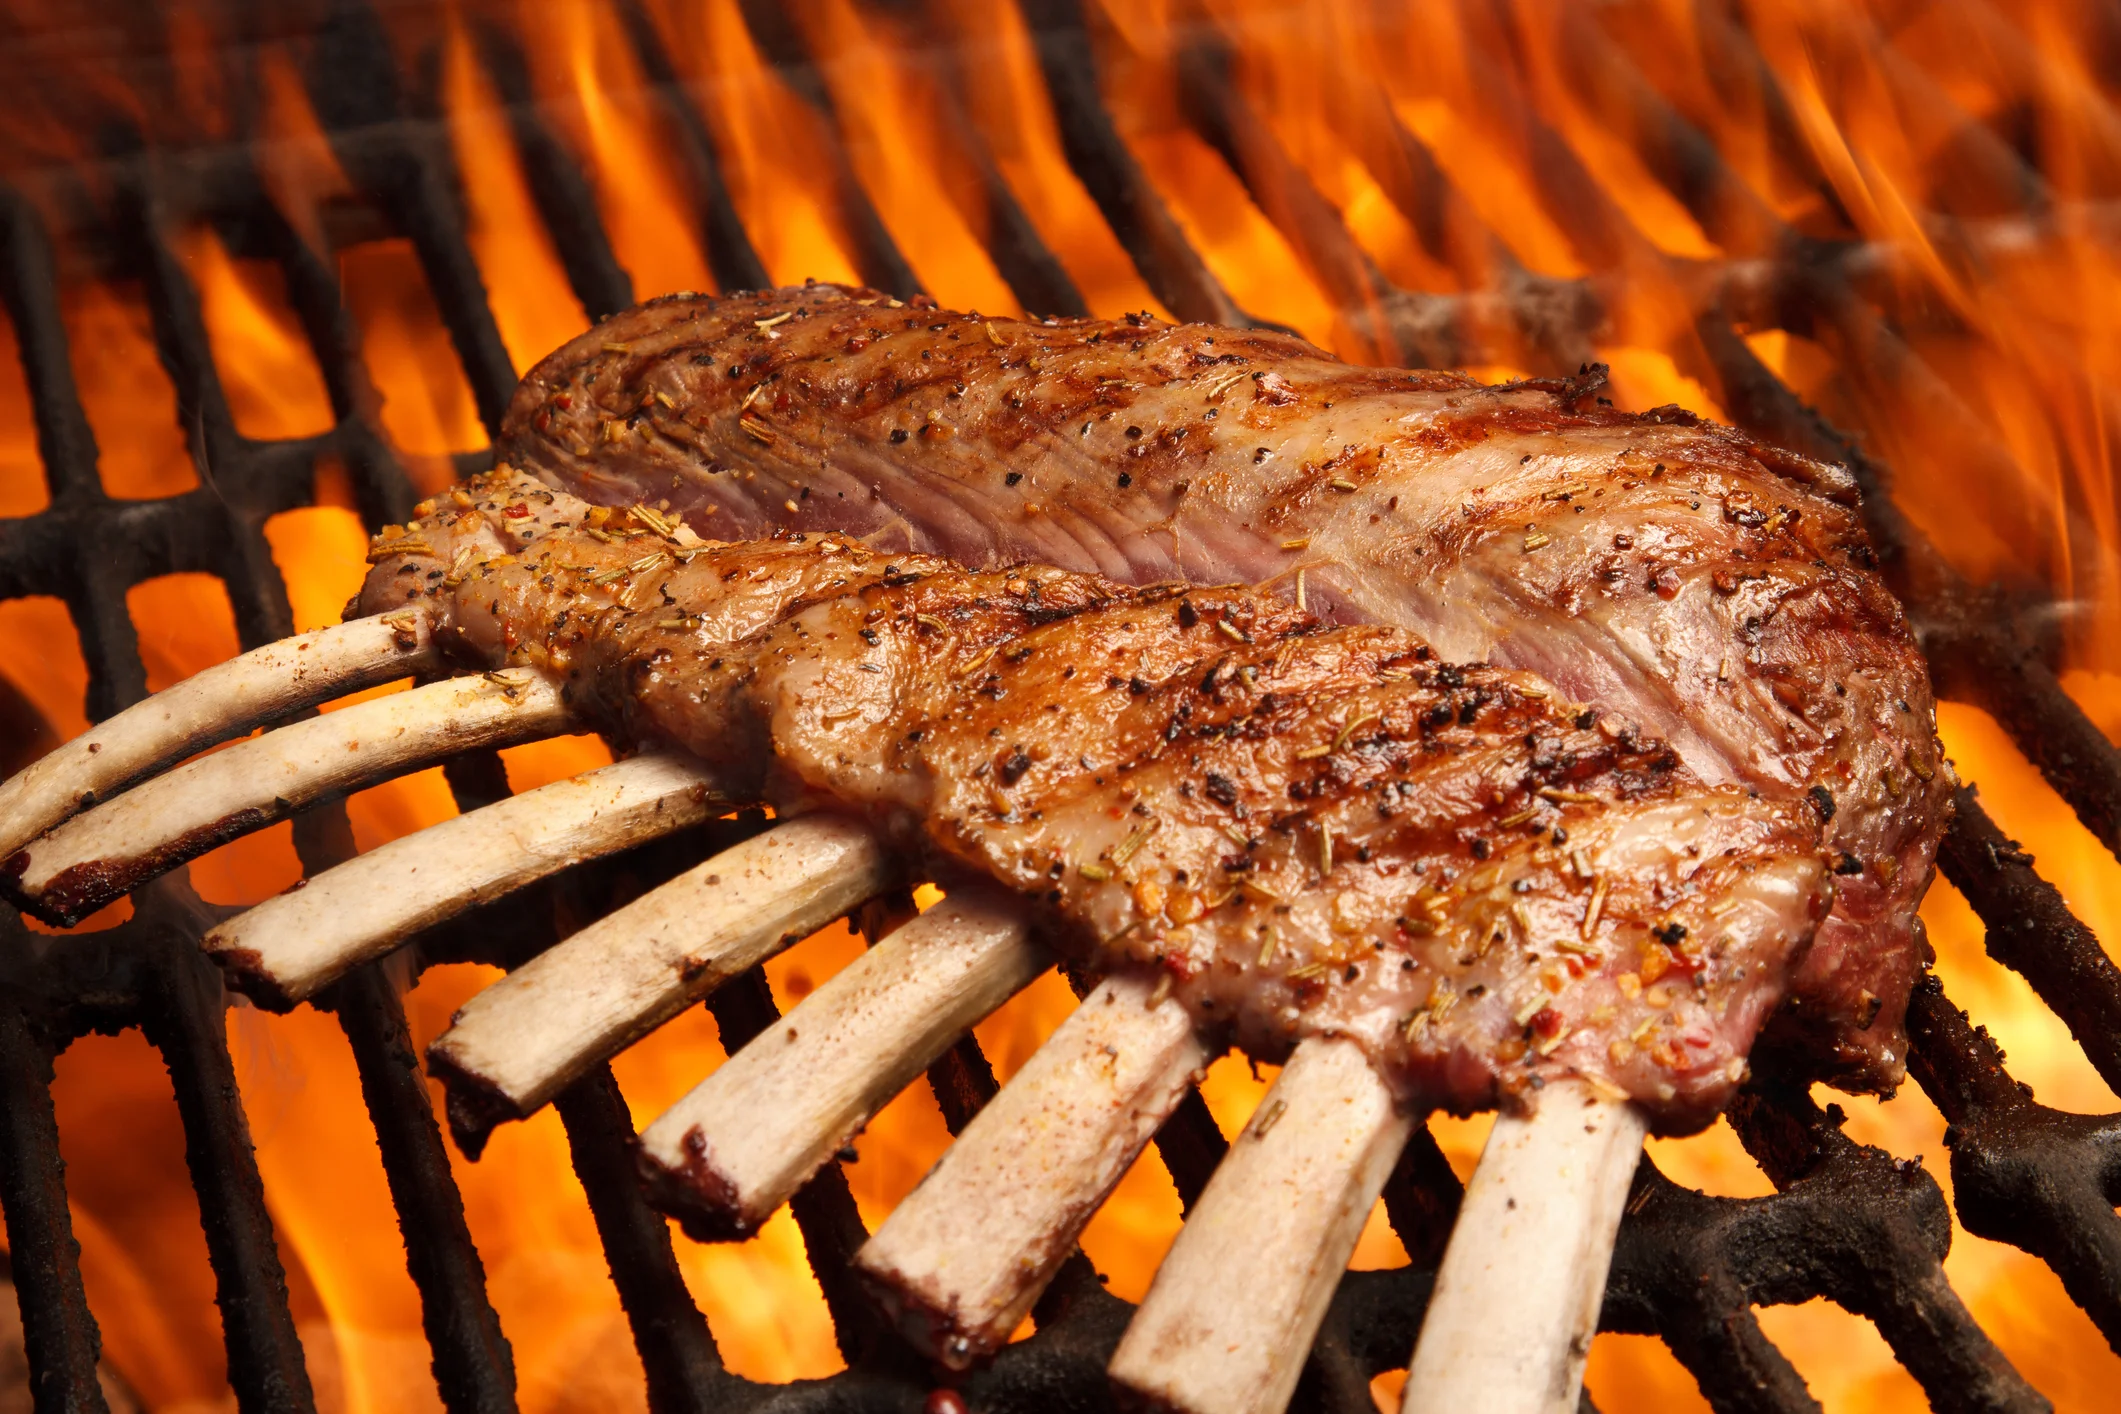
Step 2: The Perfect Sear
Preparing for High-Heat Searing
Once your ribs are tender and nearly cooked, it’s time to crank up the heat. Clear the grill to create direct high heat zones or preheat a cast iron skillet until it’s smoking hot. It’s important to have everything ready before transferring the ribs to this intense heat, as timing is key to avoid burning.
Achieving the Ideal Crust on Your Ribs
The searing process caramelizes the rub and any natural sugars in the meat, producing a flavorful, crispy crust. Be mindful to turn the ribs frequently to prevent charring. This stage should be quick, generally only a few minutes per side, just enough to develop the crust without drying the meat.
Timing and Techniques for Searing
Patience remains important here. Move the ribs carefully and watch for the right cues—the crust will go from pale to golden brown and finally to a rich mahogany color. If your ribs start to smoke excessively or burn, reduce the heat slightly. Using a spray bottle with water can help manage flare-ups. The goal is that perfect balance between a deep, smoky bark and tender meat inside.
Serving and Enjoying Your Reverse-Seared Ribs
Resting Your Ribs
After searing, allow your ribs to rest for at least 10 minutes. Resting lets the juices redistribute throughout the meat, enhancing moisture and flavor. This step is often overlooked but makes a noticeable difference in the final bite.
Recommended Sides and Sauces
Reverse-seared ribs pair wonderfully with classic barbecue sides like coleslaw, baked beans, or cornbread. When it comes to sauces, customize to your taste. Whether you prefer tangy vinegar-based sauces or sweeter, tomato-rich varieties, brush them on just before serving or serve on the side to keep your crust intact.
Storage and Reheating Tips
If you have leftovers, store ribs properly in airtight containers or wrap tightly in foil. Reheating gently is key to maintaining flavor and texture—avoid microwaving if possible. Instead, reheat in a low oven or even on a grill over indirect heat, adding a splash of water or broth to keep the meat moist.
Common Mistakes and How to Avoid Them
Overcooking or Undercooking
One of the biggest pitfalls with reverse searing is losing control over internal temperature. Without monitoring, you risk drying out or undercooking your ribs. Invest in a quality thermometer and trust it. Remember that carryover cooking will continue to raise the temperature slightly during resting.
Improper Sear Execution
Searing at too high a temperature or for too long can char the meat, creating bitterness instead of flavor. On the other hand, searing too lightly won’t develop that desirable crust. Prepare your heat zones well and keep a close eye on timing to strike the perfect balance.
Maintaining Moisture and Flavor
Rib moisture depends not just on cooking technique but also on seasoning and preparation. Avoid over salting, which can draw moisture out prematurely. Apply rubs evenly and generously, and always plan for a resting period. These steps help preserve tenderness and amplify flavor.
Bonus: Experimenting with Flavor Profiles
Using Different Wood Chips for Smoking
The choice of wood chips can completely transform the flavor of your ribs. Mild woods like alder or pecan are great for subtlety, while mesquite offers strong, intense smoke. Mixing woods can create unique profiles—apple and hickory together, for instance, provide a sweet yet bold taste. Experiment to find what suits your palate best.
Creative Rub and Sauce Combinations
Don’t be afraid to get creative with your rubs and sauces. Adding spices like smoked paprika, cumin, or even coffee grounds can add depth. On the sauce side, blend flavors like mustard with honey, or chipotle with lime to customize your finishing touch. The reverse sear method provides a wonderful canvas to showcase innovative flavor layering.

