Introduction to Hardwood Floor Repair and Refinishing
Hardwood floors add timeless beauty and value to any home, yet over time they inevitably suffer from wear and tear. Scratches, dents, and dull surfaces can detract from their original charm. The good news is that many homeowners can restore their floors to near-new condition using common tools and straightforward techniques. Understanding the repair and refinishing process is crucial to avoid costly mistakes and achieve lasting results. This article guides you through practical steps to repair and refinish hardwood floors yourself, highlighting common problems and clear solutions.
Essential Tools for DIY Hardwood Floor Restoration
Common Hand Tools Every Homeowner Should Have
Before diving into floor restoration, having the right hand tools on hand is essential. Basic items like a putty knife, hammer, tape measure, and hand scraper can help you tackle most small repairs. These tools are typically affordable and easy to use, enabling you to address scratches and minor damage without specialized equipment. The problem many face is underestimating how much preparation work is required; having these tools ready prevents interruptions.
Power Tools That Simplify the Process
While hand tools are useful, power tools significantly speed up sanding and refinishing. Renting an orbital sander or drum sander can save hours compared to manual sanding. The challenge lies in using these tools correctly to avoid gouging the wood or producing uneven surfaces. Investing time in learning safe power tool operation, and using appropriate grit sandpaper, can make restoration smoother and more professional-looking.
Step-by-Step Guide: Preparing Your Floor for Repairs
Assessing Damage and Identifying Problem Areas
Before any work begins, thoroughly inspecting the floor for damage is essential. Common issues include deep scratches, dents, water damage, and loose boards. Failure to identify these early often results in patchy repairs or the need for redoing work later. Walk around the room in good light, marking areas that require attention. This targeted approach ensures your efforts are focused and efficient.
Cleaning and Sanding Techniques Using Basic Tools
Clean floors are the foundation for successful refinishing. Dirt and debris can interfere with sanding and finishing, causing imperfections. Using a stiff broom and vacuum, thoroughly remove dust and grit. If sanding by hand or with a power sander, start with coarser grit to remove old finish and surface damage, then progress to finer grits for smoothness. The problem with rushing this step is a rough or uneven finish that will be obvious after staining or sealing.
Repairing Scratches, Dents, and Gaps with Household Items
Filling and Smoothing Minor Imperfections
Scratches and shallow dents are common and often fixable with simple materials like wood filler or putty, which many homeowners already have or can easily acquire. Applying filler with a putty knife and sanding smooth after drying blends imperfections into the floor. One frequent mistake is overfilling or using a mismatched color, leading to noticeable patches. Testing filler colors on a hidden spot and applying thin layers improves the repair’s invisibility.
Replacing Damaged Planks Without Specialized Equipment
Severe damage sometimes requires plank replacement, which appears daunting without special tools. However, with patience and basic tools such as a circular saw and pry bar, you can remove damaged boards and fit new ones precisely. The challenge is aligning new planks seamlessly with existing flooring to avoid visible lines. To address this, carefully measure and trim new boards, and consider patching multiple boards for a cohesive look. For complex blends between new and old wood, professional help is advisable.
Refinishing Your Hardwood Floor: Tips and Tricks
Choosing the Right Finish for a Durable Surface
Selecting an appropriate finish is vital to protect your hardwood and maintain its appearance. Options range from oil-based polyurethane to water-based finishes, each with pros and cons like drying time and durability. The problem many DIYers face is choosing finishes that don’t suit their lifestyle or floor traffic, causing premature wear. Consider your household’s needs, desired sheen, and local climate when choosing a finish to ensure long-lasting results.
Application Methods Using Common Tools
Applying finish with brushes, rollers, or applicator pads is feasible without specialized tools. The key is to use smooth, even strokes and avoid excess buildup, which can cause bubbling and uneven drying. Many novices mistakenly rush or apply thick coats, resulting in an unattractive finish that requires stripping and reapplication. Taking your time for multiple thin coats with adequate drying between ensures a professional result with just common tools.
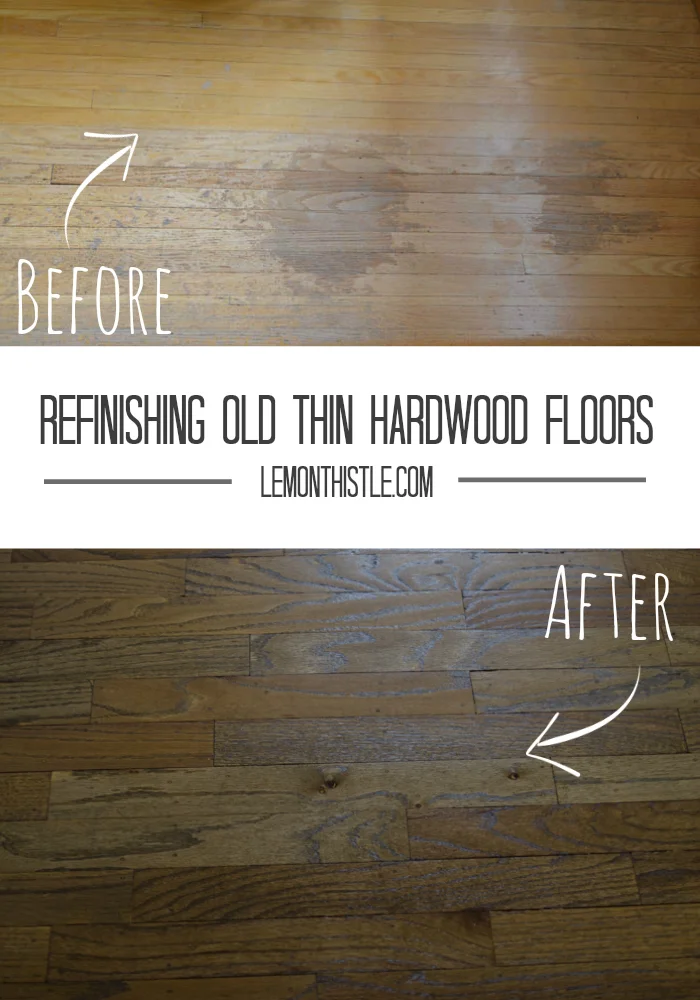
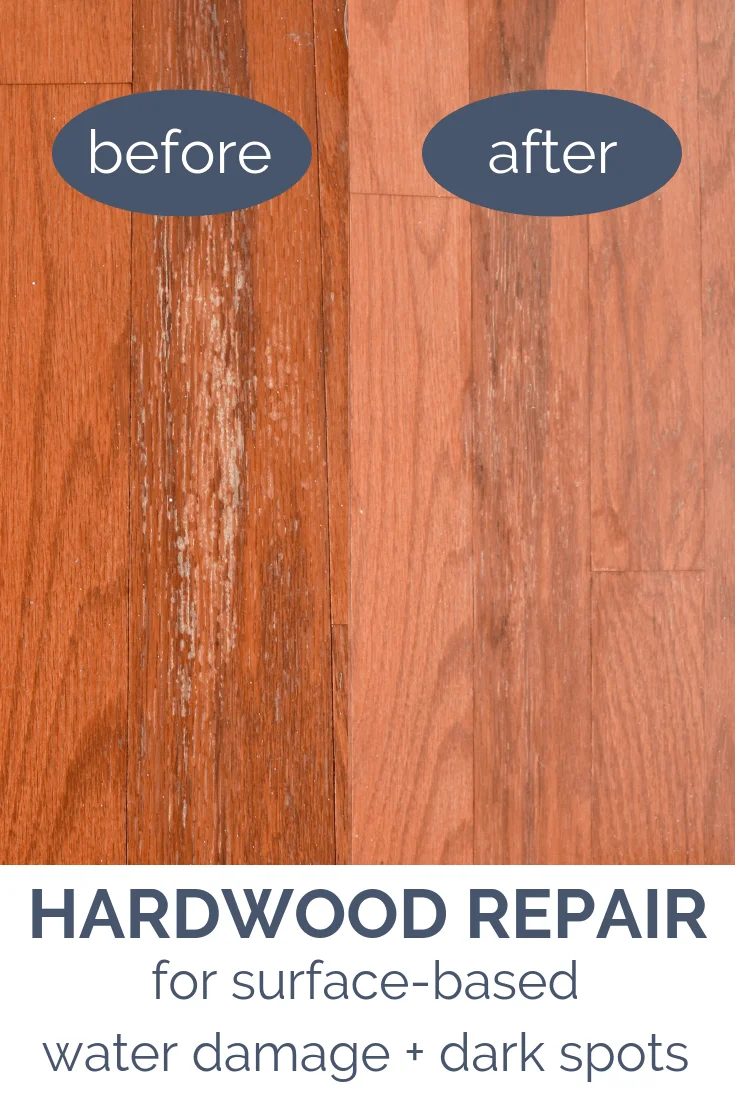
Before and After: Visual Transformations and What to Expect
Showcasing Real-Life Examples
Seeing before and after transformations can motivate and guide your project. Floors marred by scratches and dullness can be restored to glowing, smooth surfaces that brighten rooms and improve home value. Keep in mind that results depend on the extent of damage, care in each step, and quality of materials used. Expecting perfection without effort sets up disappointment, so focus on gradual improvement and learning through the process.
Maintaining Your Newly Restored Floors
After investing time and effort in restoring your hardwood floors, ongoing maintenance is crucial to preserve their beauty. Regular cleaning, prompt attention to spills, and using furniture pads prevent new damage. One common pitfall is neglecting maintenance, which quickly erodes your restoration work. Additionally, consider cohesive flooring throughout multiple rooms to improve flow and make spaces feel bigger. If future complex issues arise, hiring trusted local professionals can reduce stress and prolong your floors’ life.

