Introduction to Custom Floating Shelves
Why Choose Floating Shelves?
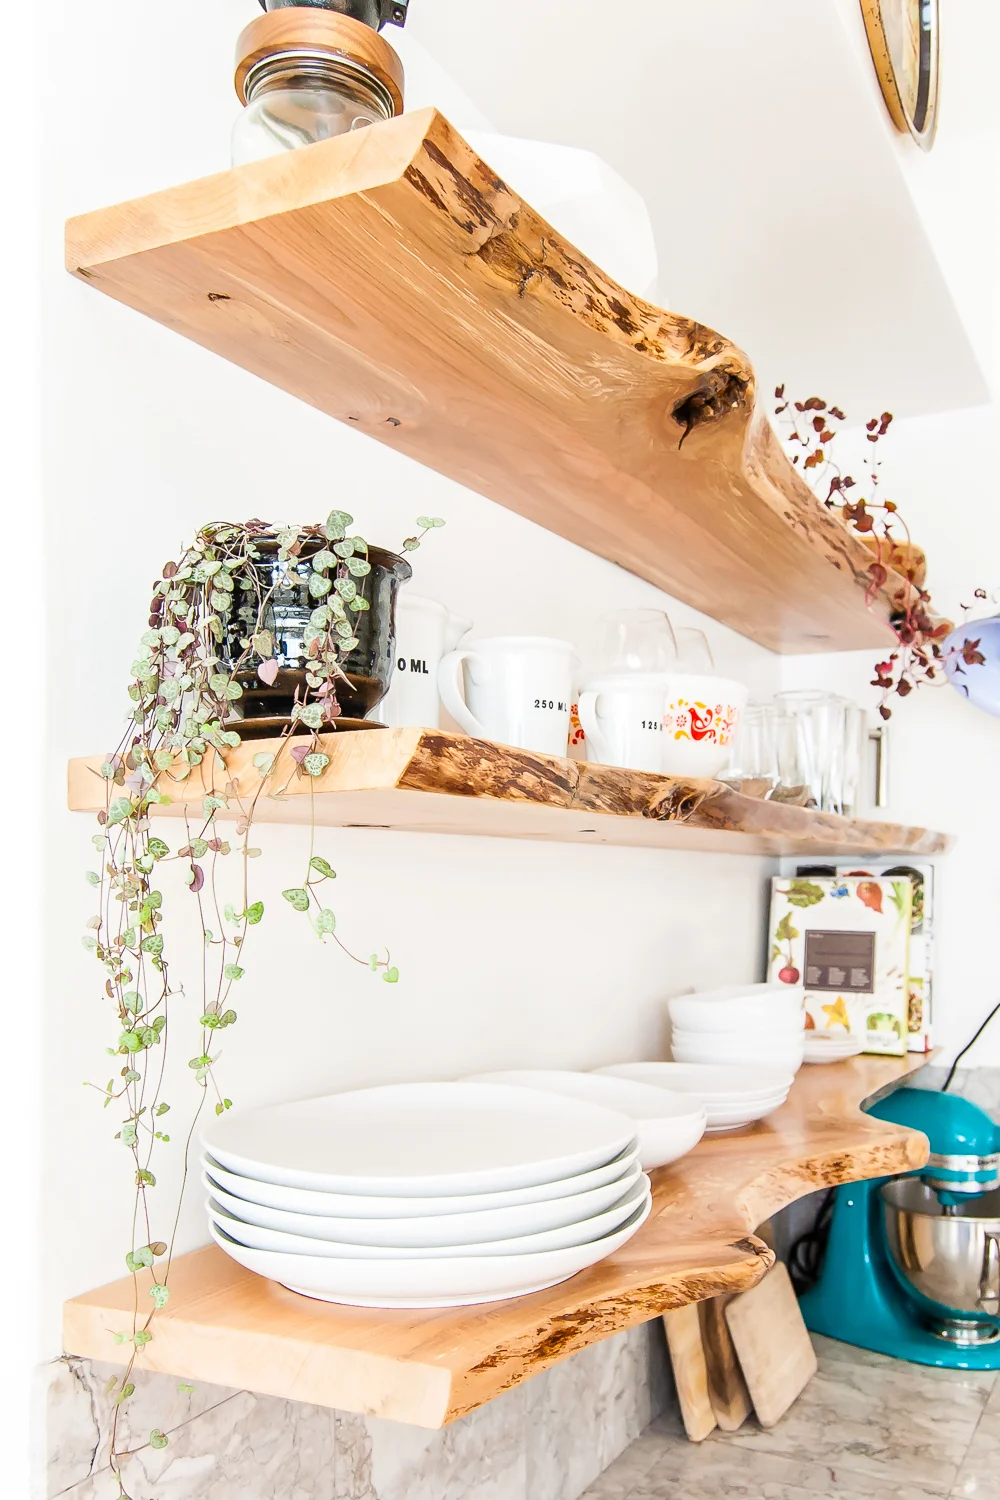
Floating shelves have become a popular choice for modern interiors due to their sleek and minimalist appearance. Unlike traditional shelves that rely on visible brackets, floating shelves create an illusion of hovering on the wall. This design not only saves space but also offers a clean, uncluttered look that complements various decor styles. However, buyers often find prefabricated floating shelves limiting in size or style, which is why custom shelves are an excellent alternative.
Benefits of DIY Floating Shelves
Creating your own floating shelves can be surprisingly accessible, even if you have minimal carpentry skills. The main challenge lies in ensuring the shelves are strong enough to hold weight and properly mounted. Yet, making them yourself allows you to tailor the dimensions, wood type, and finish to perfectly fit your space and aesthetic preferences. Moreover, homemade shelves can be more cost-effective and rewarding, giving you a functional piece of art forged by your own hands.
Essential Materials and Tools Needed
Selecting the Right Wood
The choice of wood significantly affects both the look and durability of your floating shelf. Softwoods like pine are easier to work with for beginners but require careful sanding to avoid gouges or divots. For deeper shelves, using ¾” plywood presents a balance between cost and stability. It’s important to purchase wood that is straight and free from warps. Planning your measurements in advance helps as many home improvement stores offer cutting services, saving you effort and increasing precision.
Watch the Tutorial
Tools for Beginners
Minimal carpentry skills can still achieve professional results with a few essential tools. A miter saw is invaluable for quick and accurate cuts, although alternatives like a jig saw or circular saw paired with a square guide can suffice. Sanding edges smoothly avoids rough patches; using a palm router with a round-over bit can provide a more consistent and efficient finish than sanding alone. Basic hand tools such as a drill, level, and screwdriver will help with assembly and mounting.
Additional Hardware Components
Mounting hardware directly impacts the strength and stability of floating shelves. Using sturdy metal flanges or brackets designed to fit inside the shelf frame ensures a clean look without exposed supports. Make sure to use screws long enough to penetrate at least two studs behind the drywall for optimal support. Attaching the shelf securely to the bracket with two screws per board attachment point greatly reduces the risk of the shelf slipping or sagging. Finishing nails and wood glue come in handy when assembling the shelf box itself.
Step-by-Step Guide to Building Floating Shelves
Measuring and Planning Your Shelf
Accurate measuring is critical to avoid common pitfalls like misaligned shelves or inability to properly secure to studs. Begin by identifying the locations of at least two studs along your planned shelf line, as this is essential for strength. Sketch your shelf dimensions, keeping in mind the depth and length should correspond with stud spacing to distribute weight evenly. Remember, purchasing wood once measurements are set allows for pre-cutting, which saves time and ensures precision.
Cutting and Preparing the Wood
Cutting wood accurately prepares your project for smooth assembly. Use a miter saw for cutting frame pieces to size quickly. For cutting plywood or assembling parts of the shelf box, a circular or table saw works best. Sand all edges to remove splinters or factory roughness, and avoid pausing in one spot on soft pine to prevent divots. For a polished finish, consider using a router with a round-over bit for consistent edge shaping.
Assembling the Shelf Bracket
The bracket structure supports the entire shelf; if it’s weak, the shelf will fail. Use scrap 2×4 boards for a solid frame, fastening parts together with 1¼” finish nails and wood glue for a secure box shape. Begin attaching one screw into a stud to stabilize the frame, which makes balancing and leveling easier during installation. Using two screws per attachment point adds strength, and fastening the top and bottom holes of the flange to studs ensures a solid hold.
Mounting the Shelf on the Wall
Mounting can be tricky if the wall is uneven or if the bracket isn’t properly secured. Before fully tightening, check the level of your bracket carefully to avoid a tilted shelf. It’s important not to rely on drywall anchors alone—always screw directly into the studs when possible. After securing the bracket, attach the shelf to it with screws to prevent it from sliding off. This step completes the installation while providing both safety and longevity.
Creative Design Ideas for Custom Floating Shelves
Using Paint and Stain for a Unique Look
Finishing your shelves creatively can elevate their appeal. Painting or staining not only enhances wood grain but also allows customization to match your room’s color scheme. For instance, using metallic paints on pipe fittings for brackets can add unexpected flair, as some users have customized shelves with gold accents. Consider combining different finishes on the shelf surface and brackets for contrast and visual interest.
Incorporating Decorative Elements
Adding decorative touches can transform simple shelves into statement pieces. Options include attaching small molding or trim to the edges, integrating decorative brackets alongside the functional supports, or embedding artwork or decals onto the shelf’s underside. Such details personalize the shelves and can tie them into the overall room decor.
Combining Shelves and Lighting
Integrating lighting into or around floating shelves enhances both functionality and aesthetics. LED strip lights can be attached underneath to illuminate items displayed or create ambient lighting. This combination highlights the shelves and adds warmth to your space. Planning the wiring and ensuring easy access to power sources is key to a successful lighting addition.
Troubleshooting Common Issues
Ensuring Stability and Strength
One of the most frequent problems is shelf sagging or instability. This is often caused by inadequate attachment to studs or using insufficient screws at each joint. Avoid placing the shelf on drywall anchors alone and ensure multiple screws fasten the shelf firmly. Using thicker plywood and considering the distribution of weight on the shelf can also improve durability. If the shelf feels wobbly upon installation, double-check that all screws are tight and that the bracket is flush against the wall.
Dealing with Uneven Walls
Uneven walls pose a challenge for floating shelves, potentially causing gaps and instability. To solve this, use shims behind the bracket to level the frame before securing it. Another strategy is to carefully sand or plane the back surfaces of the shelf or bracket to fit the contour of the wall better. Taking time during the mounting process to check for level and flush contact prevents future problems with crooked shelves.
Final Tips for Long-lasting Floating Shelves
Maintenance and Care
To keep floating shelves looking good and functioning well over time, regular maintenance is important. Dust them often and clean spills immediately to prevent damage to wood finishes. Avoid placing excessively heavy items beyond the recommended weight limits. If you notice any looseness, re-tighten screws promptly to maintain firmness.
Safety Precautions to Follow
Safety should never be overlooked during installation. Always use proper tools and wear protective gear like goggles and gloves when cutting or sanding wood. Confirm that shelves are securely fastened before placing objects on them to prevent accidents. Additionally, keeping edges smooth reduces risk of injury, especially in homes with children.

